DIY: Branch Accessories Hanger
Hello! I've got another DIY tutorial for you, for a little project I did when I was at home for Easter. Well, actually it was a little more time consuming than some of my other DIYs, mainly because I lacked some of the necessary handyman skills:). It's probably a quick one-hour project for anyone who knows how to mount stuff onto walls and all that. I was going to make this as a coat hanger, but actually you can use it to store all kinds of things, like scarves, bags, necklaces, belts, hats, anything. Here's what I did:  STEP ONE - FIND A BRANCH
Look for a branches lying around in parks and the woods. You can always adjust the length later , so look for a branch with the right texture (not too rough, so the paint can adhere) and thickness.Also make sure that it's relatively straight, so it can lie flat against the wall. Use a small saw to shorten the branch and cut off any twigs.
STEP ONE - FIND A BRANCH
Look for a branches lying around in parks and the woods. You can always adjust the length later , so look for a branch with the right texture (not too rough, so the paint can adhere) and thickness.Also make sure that it's relatively straight, so it can lie flat against the wall. Use a small saw to shorten the branch and cut off any twigs.
 STEP 2 - PAINT
This is the fun part. Simply pick a colour scheme and go crazy. Try to match your colours to the tone of your branch. Mine was relatively cool-toned, so pastel colours worked well. I you want to, think of some patterns beforehand, because once the acrylic paint is on the wood it's super hard to get off. If you do make a mistake, dip a q-tip in water and scrape off the colour.
STEP 2 - PAINT
This is the fun part. Simply pick a colour scheme and go crazy. Try to match your colours to the tone of your branch. Mine was relatively cool-toned, so pastel colours worked well. I you want to, think of some patterns beforehand, because once the acrylic paint is on the wood it's super hard to get off. If you do make a mistake, dip a q-tip in water and scrape off the colour.
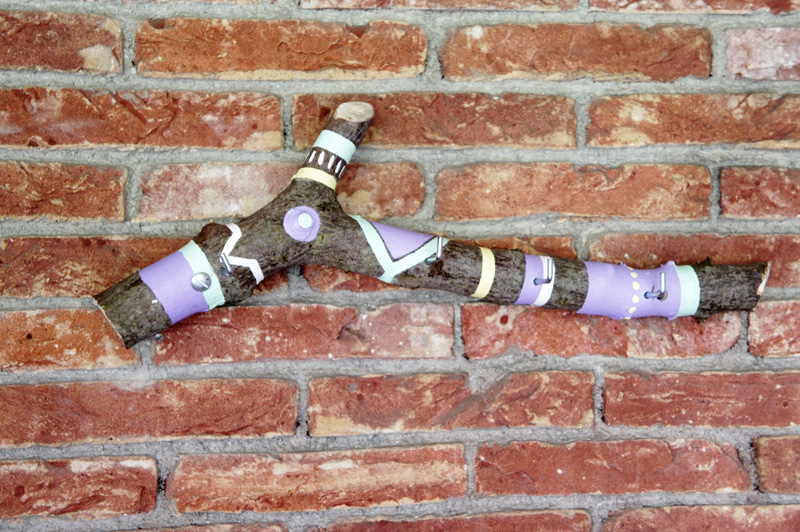
 STEP THREE - DRILLING AND MOUNTING
Once the paint has dried completely, you can mount the branch to a wall. For a branch the size of mine, you will need two long screws and four hooks. The size of the screws depend on the thickness of your branch, the wall and the type of things you want to hang onto the branch. For the screws you will need to drill holes through the wood first, and depending on the size of the hooks, it might be easier to pre-drill small holes for them too, before you screw them in. Drill two more holes into the wall (measure out the width first), and then mount the branch onto the wall with the screws.
Voila!
STEP THREE - DRILLING AND MOUNTING
Once the paint has dried completely, you can mount the branch to a wall. For a branch the size of mine, you will need two long screws and four hooks. The size of the screws depend on the thickness of your branch, the wall and the type of things you want to hang onto the branch. For the screws you will need to drill holes through the wood first, and depending on the size of the hooks, it might be easier to pre-drill small holes for them too, before you screw them in. Drill two more holes into the wall (measure out the width first), and then mount the branch onto the wall with the screws.
Voila!
